Floor Plan in a Photo Report — Add a Plan with Markers
Step by step: upload a floor plan, place defect and photo markers, build the legend. A floor plan with markers for inspection reports and photo documentation.

Andrey Apanasenko
Founder and developer of Photo Reports
What an inspection plan is
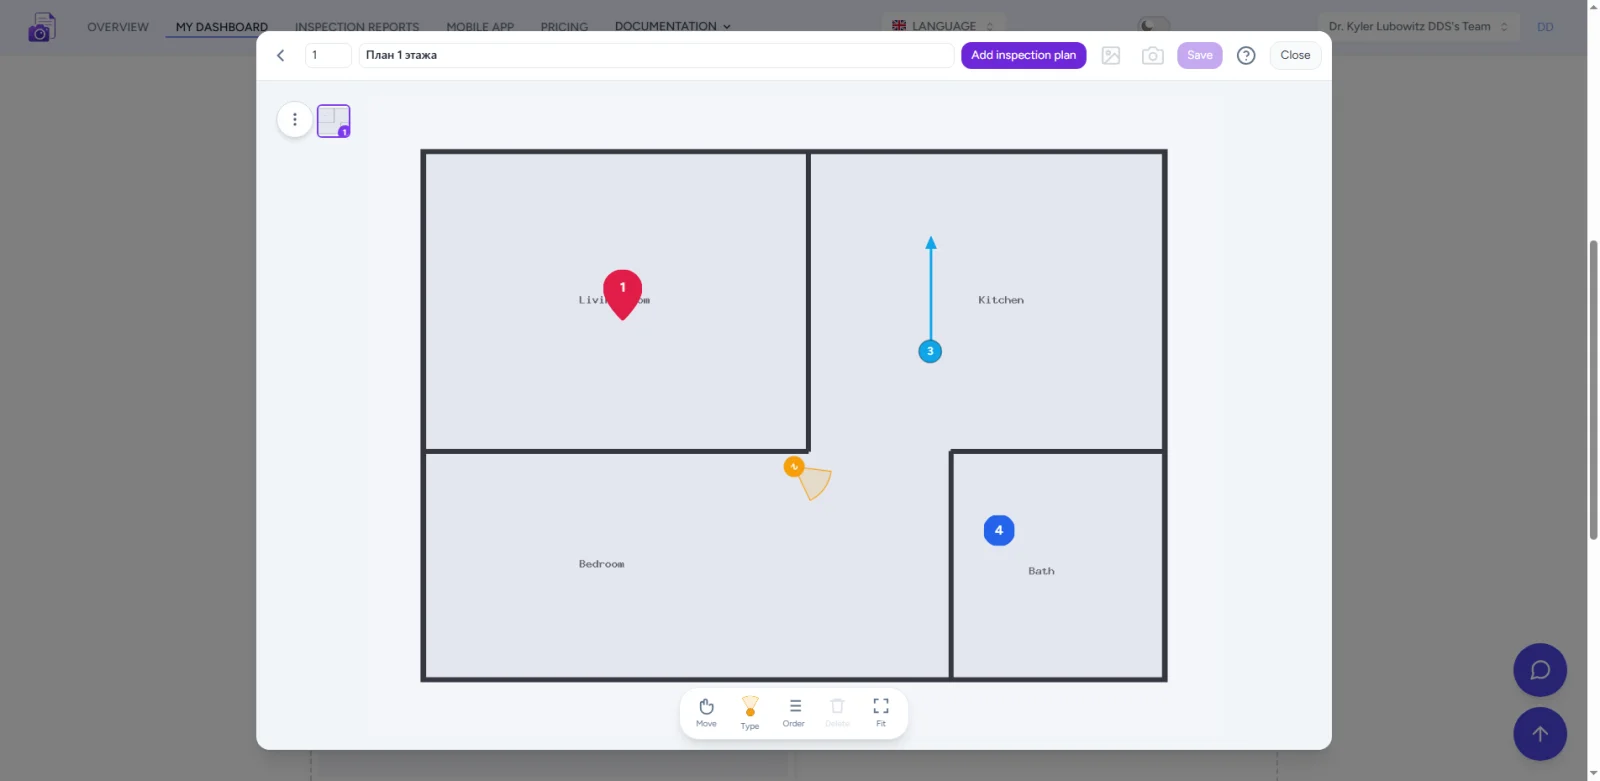
An inspection plan is an image of a floor plan (or a whole storey) with inspection points marked on it: defects, photos, camera direction and viewpoints. It becomes part of an inspection report or photo report and helps anyone find each defect on site.
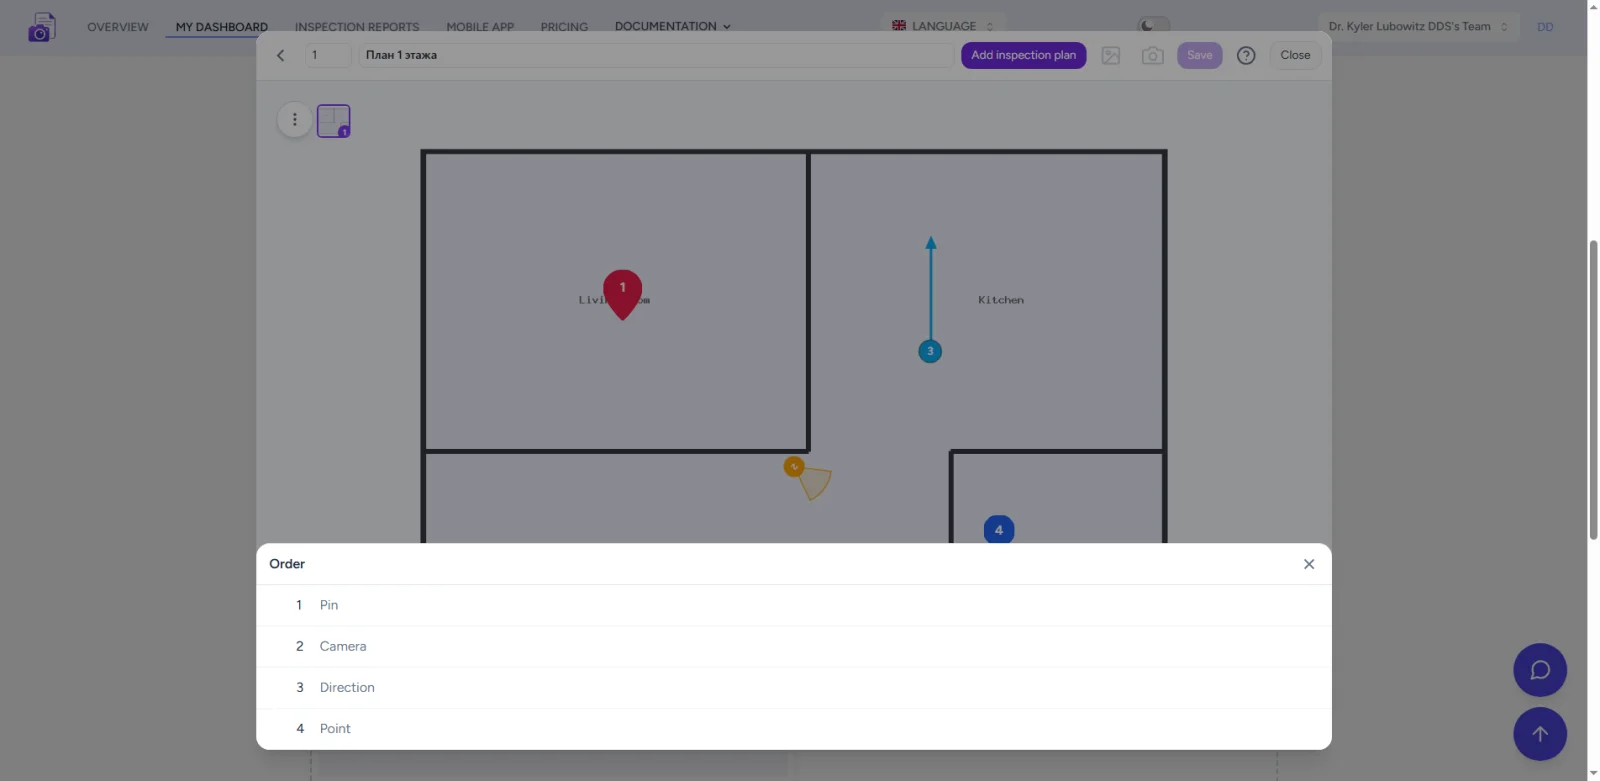
Markers come in four types: pin for a defect or remark, point for a simple mark, arrow for a direction, and camera for a field-of-view sector with direction and width. Each marker can have its own colour, size and attached photo.
Try the service
Capabilities
- Four marker types. Pin, point, direction arrow and camera with a field-of-view sector, angle and width — enough for defects, units and camera directions.
- Photo attachments. Attach a photo from the report to any marker; marker numbers match the report items.
- Capture in the editor. Take a photo straight into the report without leaving the plan editor.
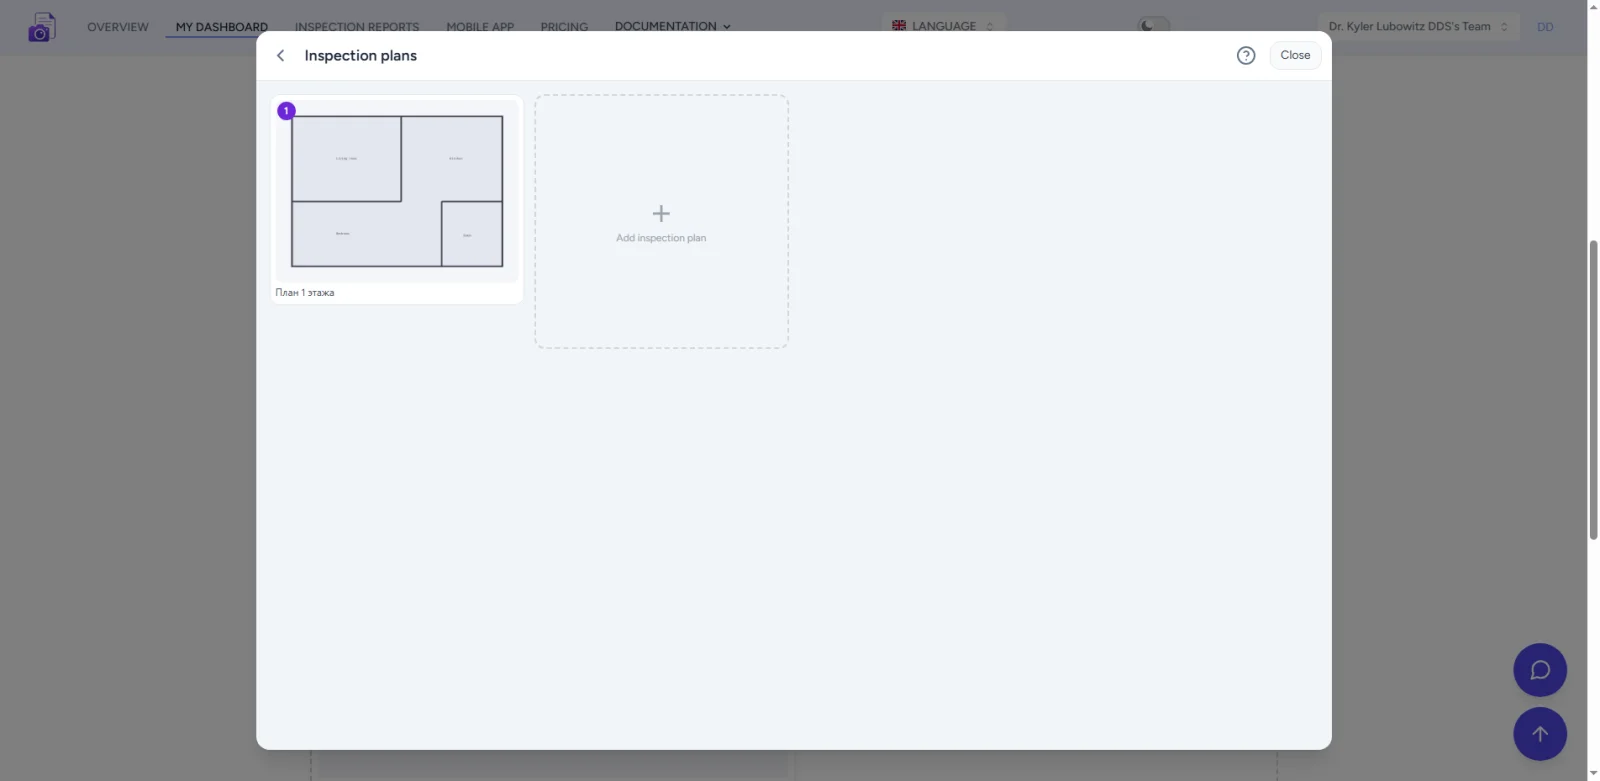
- Multiple plans. Storeys, zones and separate objects in one report, with continuous numbering and order.
- Marker legend. The list of markers is built automatically; drag to reorder items.
- Styling. Marker colour, marker size and plan scale can be tuned per object.
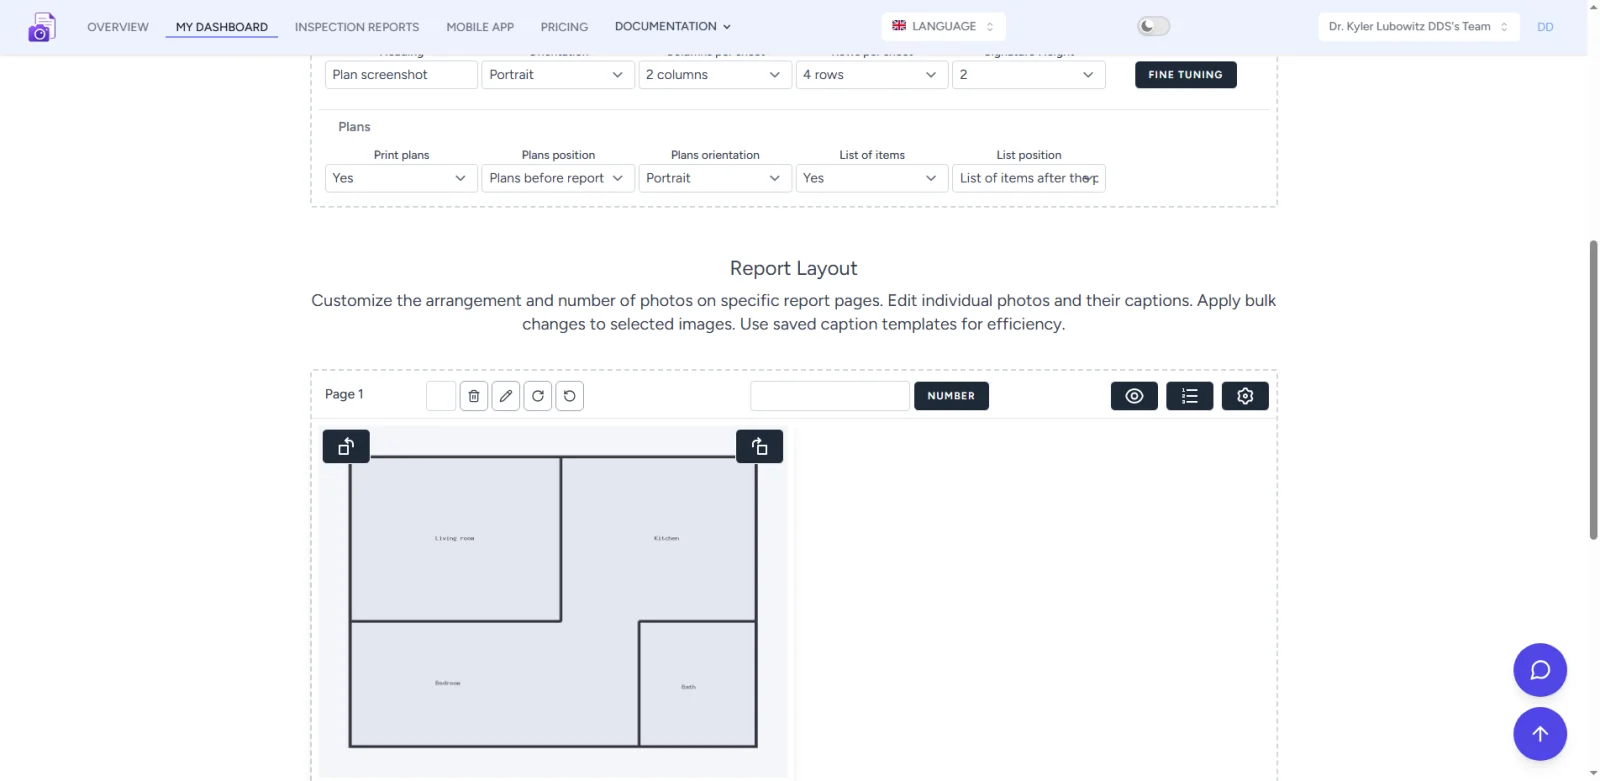
- Orientation and position. Portrait or landscape plan page, plan before or after the report, legend before or after the plan.
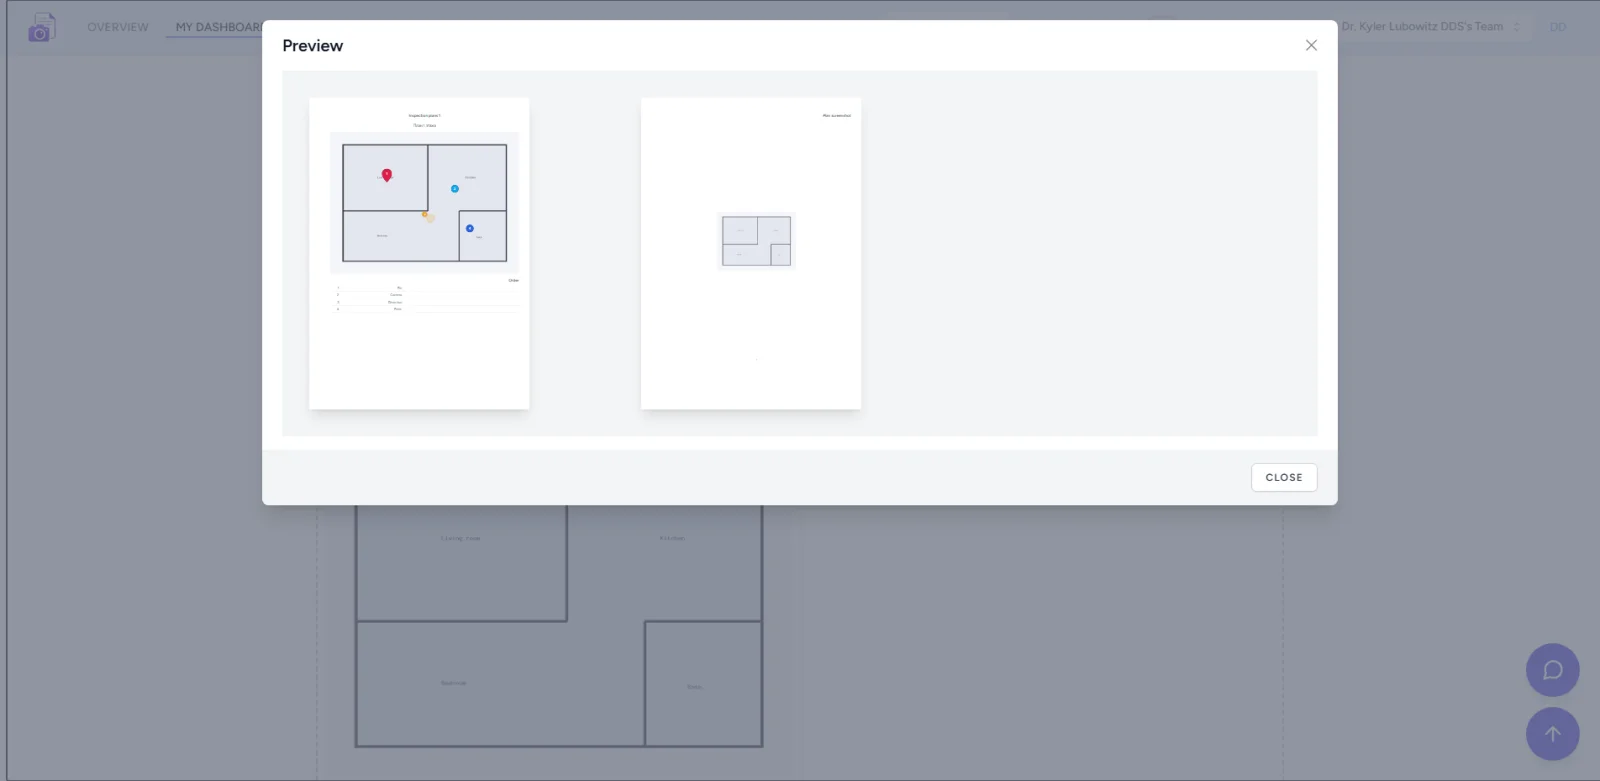
- Printing. The plan with markers and legend prints in the photo report and as a separate section in the inspection report (DOCX).
- Guest mode. Works without sign-up — try the plan tool before creating an account.
- Mobile app. The same plan is available on the phone: a specialist captures photos on set points on site.
Use cases
- Preparing before the inspection. Mark up the plan in advance; the specialist opens the same report in the mobile app and shoots on the set points without orienting on site.
- Capture on pre-set points. During the inspection photos are attached to ready-made markers — every point is covered, nothing is missed.
- Marking several plans. Separate plans per storey or zone with their own numbering and legend.
- Apartment or property handover. Defects and remarks are marked on the floor plan with photos attached — a clear picture for the client.
- Engineering systems survey. Camera markers with direction and field of view show where the specialist looked at each unit.
- Printing in inspections. The plan with markers lands in the inspection report and photo report print form — no separate drawing needed.
How to add a plan: step by step
- Open the photo report or inspection report and click “Inspection plans”.
- Upload a plan image — a photo, a scan or a drawing. Add more plans if needed.
- Pick a marker tool: pin, point, direction or camera.
- Click the plan to place a marker; drag to adjust, and rotate the camera to set the direction.
- Attach a photo and a caption to the marker; you can capture a photo right in the editor.
- Reorder markers and plans by dragging.
- In the settings choose printing, position and orientation of the plan page.
- Save the plan — it goes into the legend and the printed form.
Legend and item order
All markers are collected into a numbered legend automatically. In the report settings you can turn the list on or off and choose where it goes (before or after the plan), the orientation of the plan page (portrait or landscape) and whether plans go before or after the report. Marker numbers match the list items in the legend and in the photo annex.